Configuring Portals and Endpoints
Learn how to securely expose your backend APIs to your operational staff using APIPLAY's powerful visual builder. This guide walks through the platform features step-by-step.
1. The Developer Dashboard
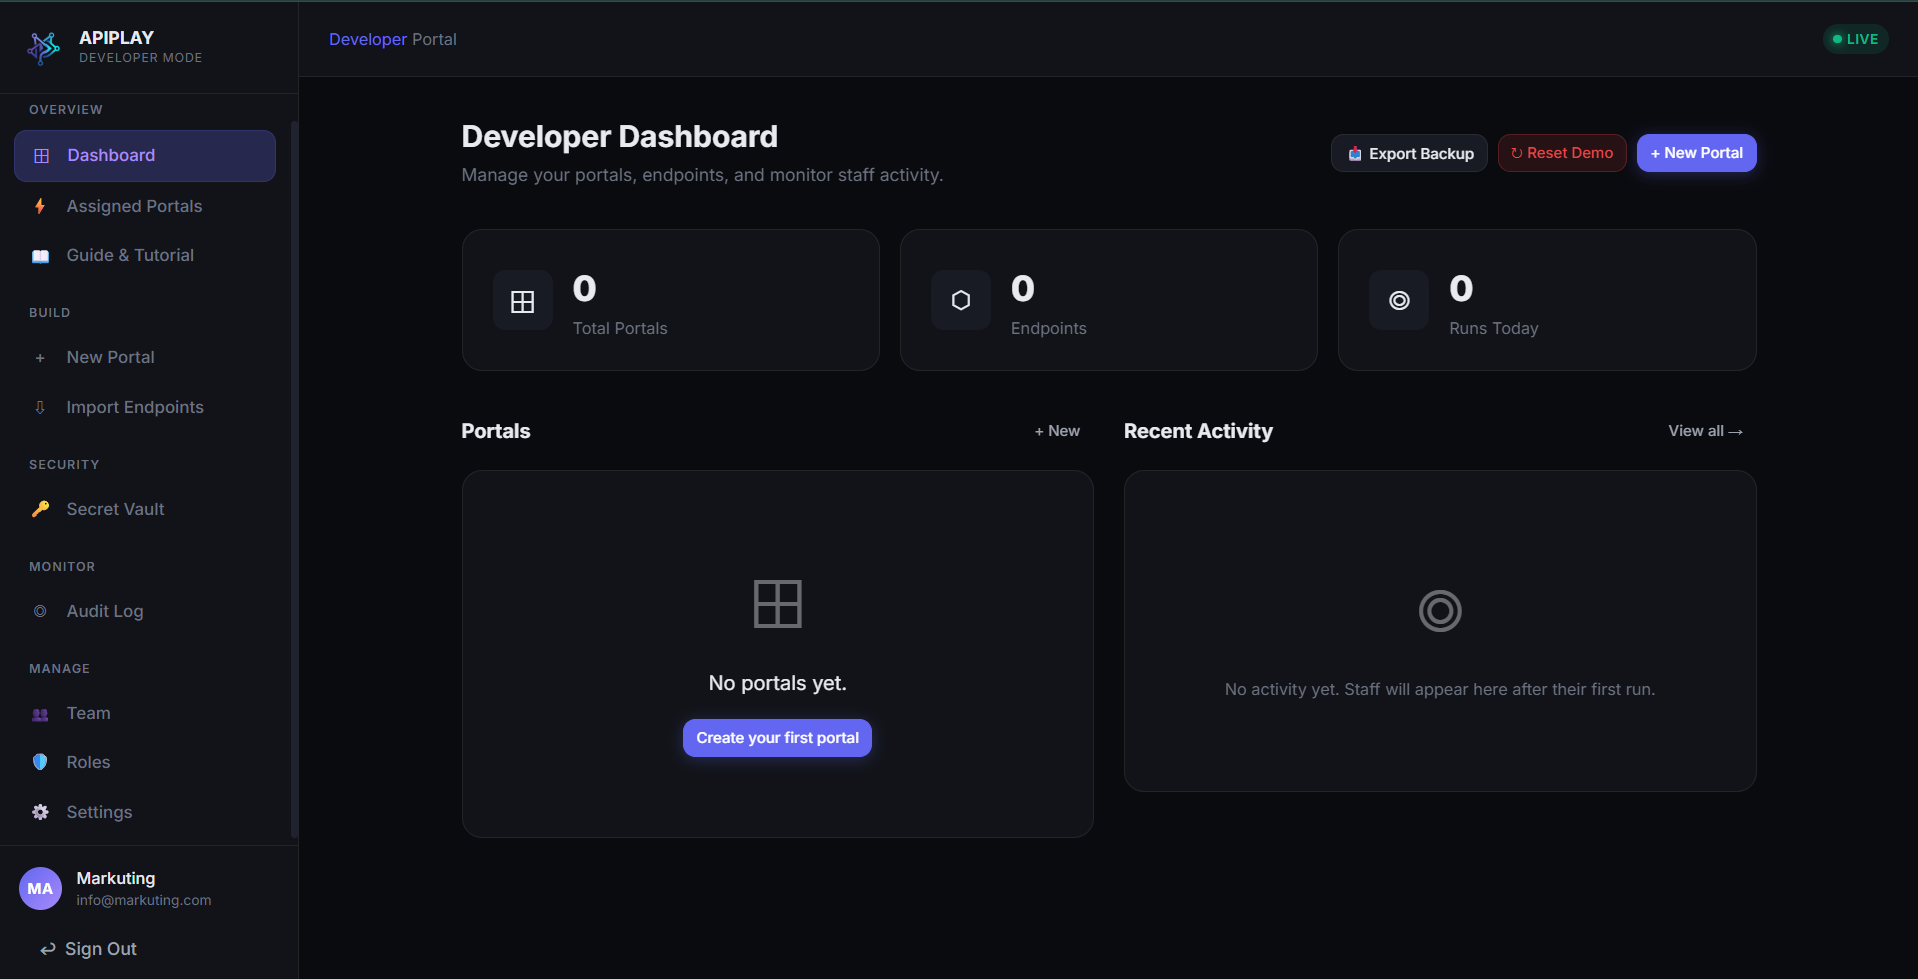
When you log in, you start at the Developer Dashboard. Here you can monitor assigned portals, endpoints, and staff runs. Click + New Portal to start building.
2. Creating a Portal
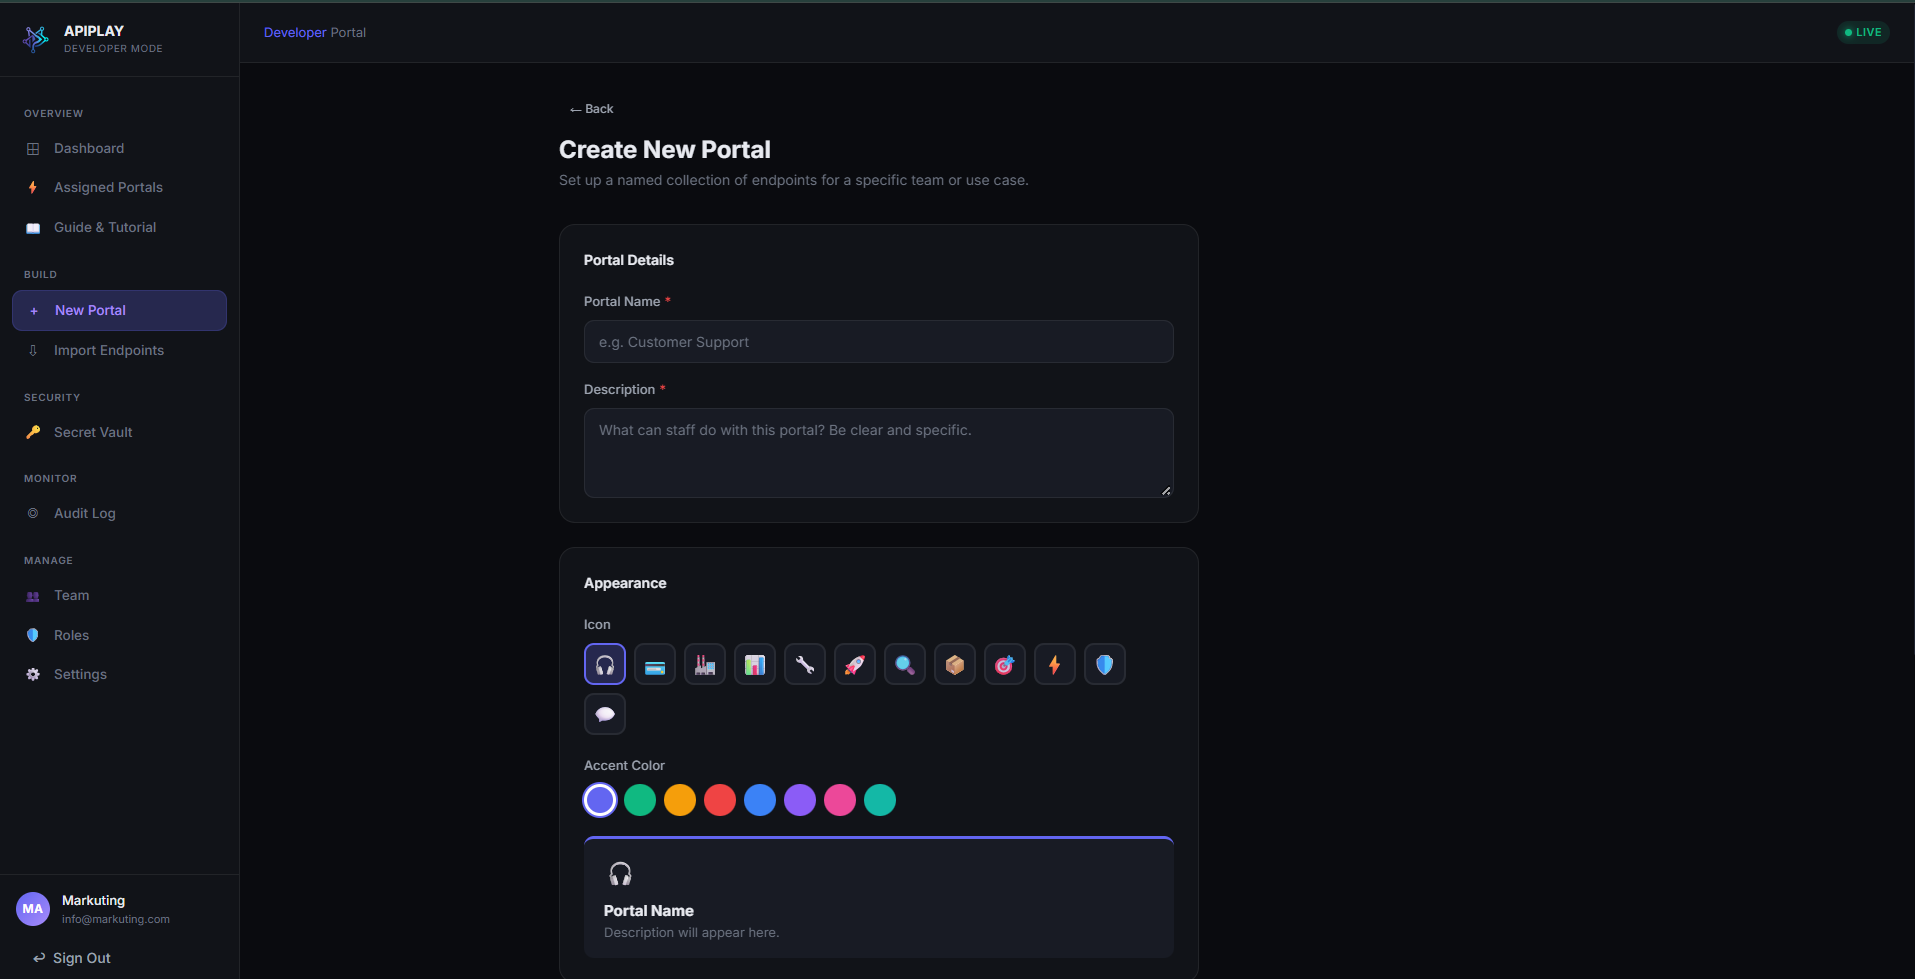
Portals are logical groupings of endpoints (e.g., "Customer Support"). You can define the Portal's Name, Description, and Appearance (Icon & Accent Color).
Managing Staff Access
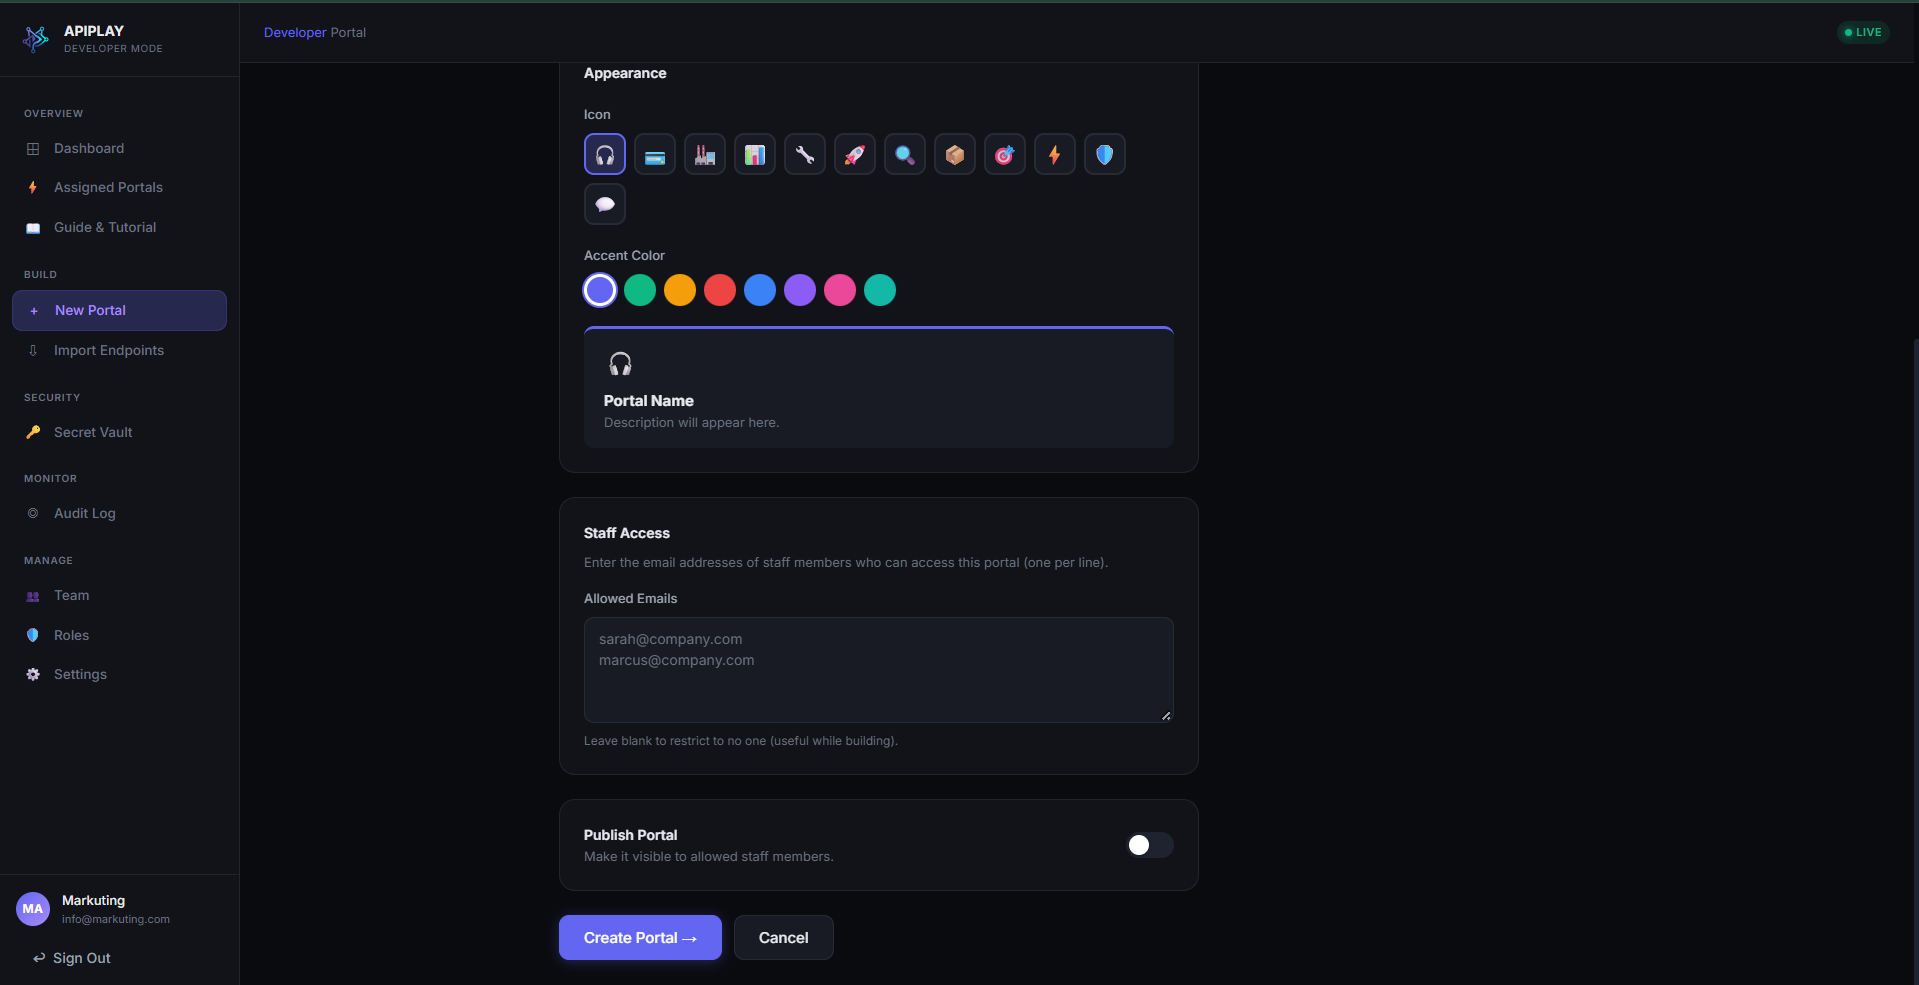
In the same view, you can restrict access to specific staff members by entering their email addresses, and toggle the portal's visibility via the Publish switch.
3. The Secret Vault
Before creating authenticated endpoints, you should store your API keys in the Secret Manager. All secrets are AES-256 encrypted at rest and are never exposed to the browser.
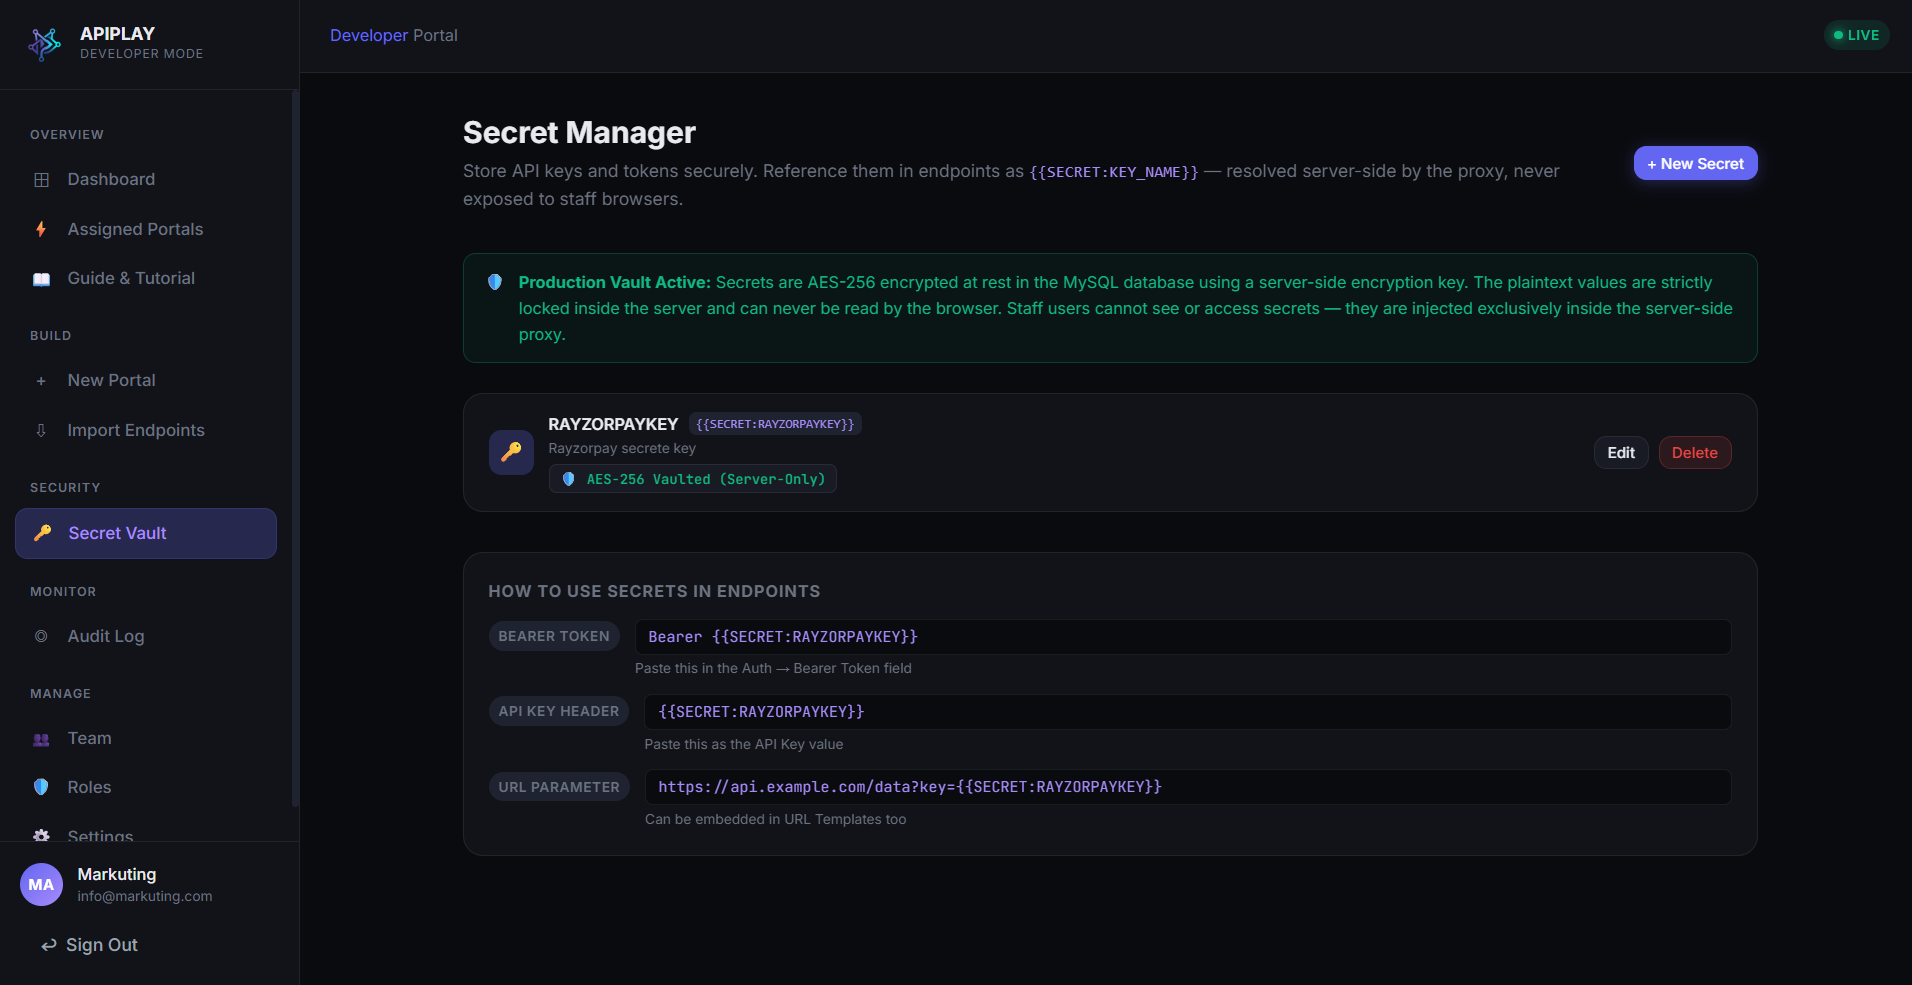
When you add a new secret, give it a descriptive name (e.g., PAYMENT_API_KEY). You will reference this name in your endpoints using the syntax {{SECRET:PAYMENT_API_KEY}}.
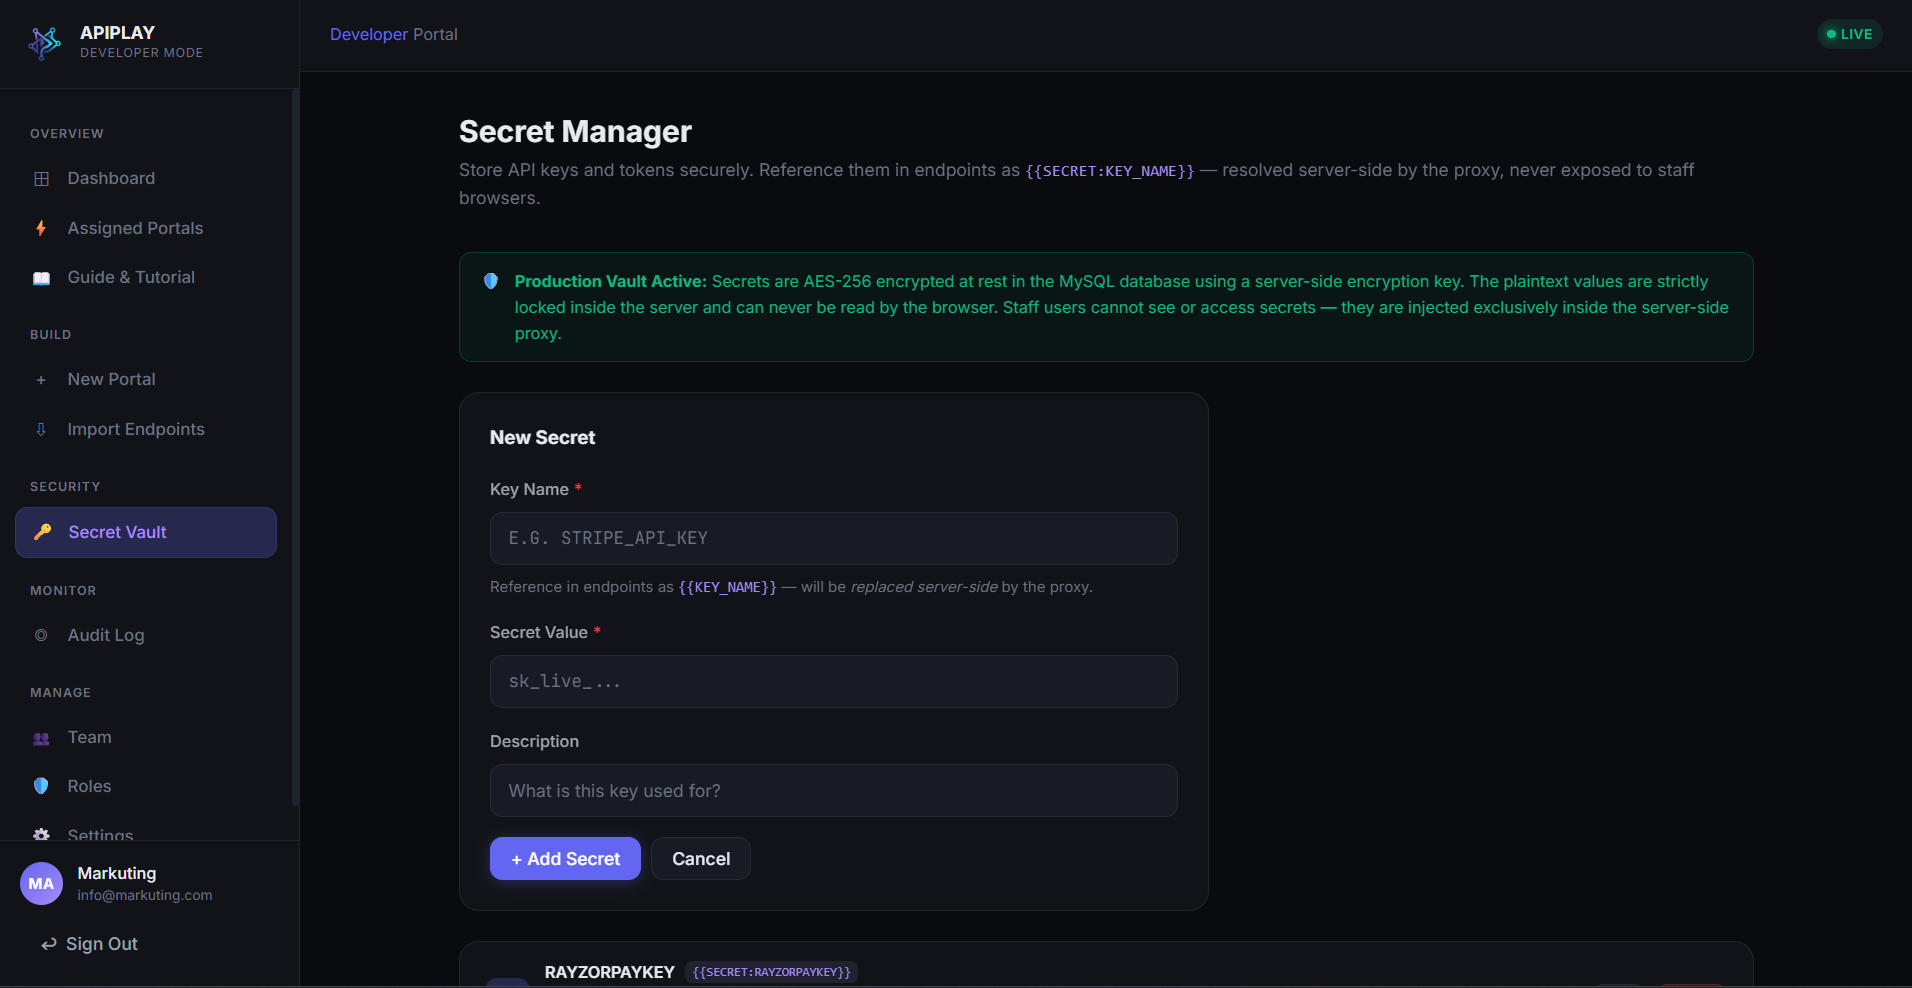
4. Editing Endpoints
Endpoints are the actual API calls your staff will execute. Start by defining the Basic details: Method (GET, POST, etc.), base URL template, and environments (Staging/Production).
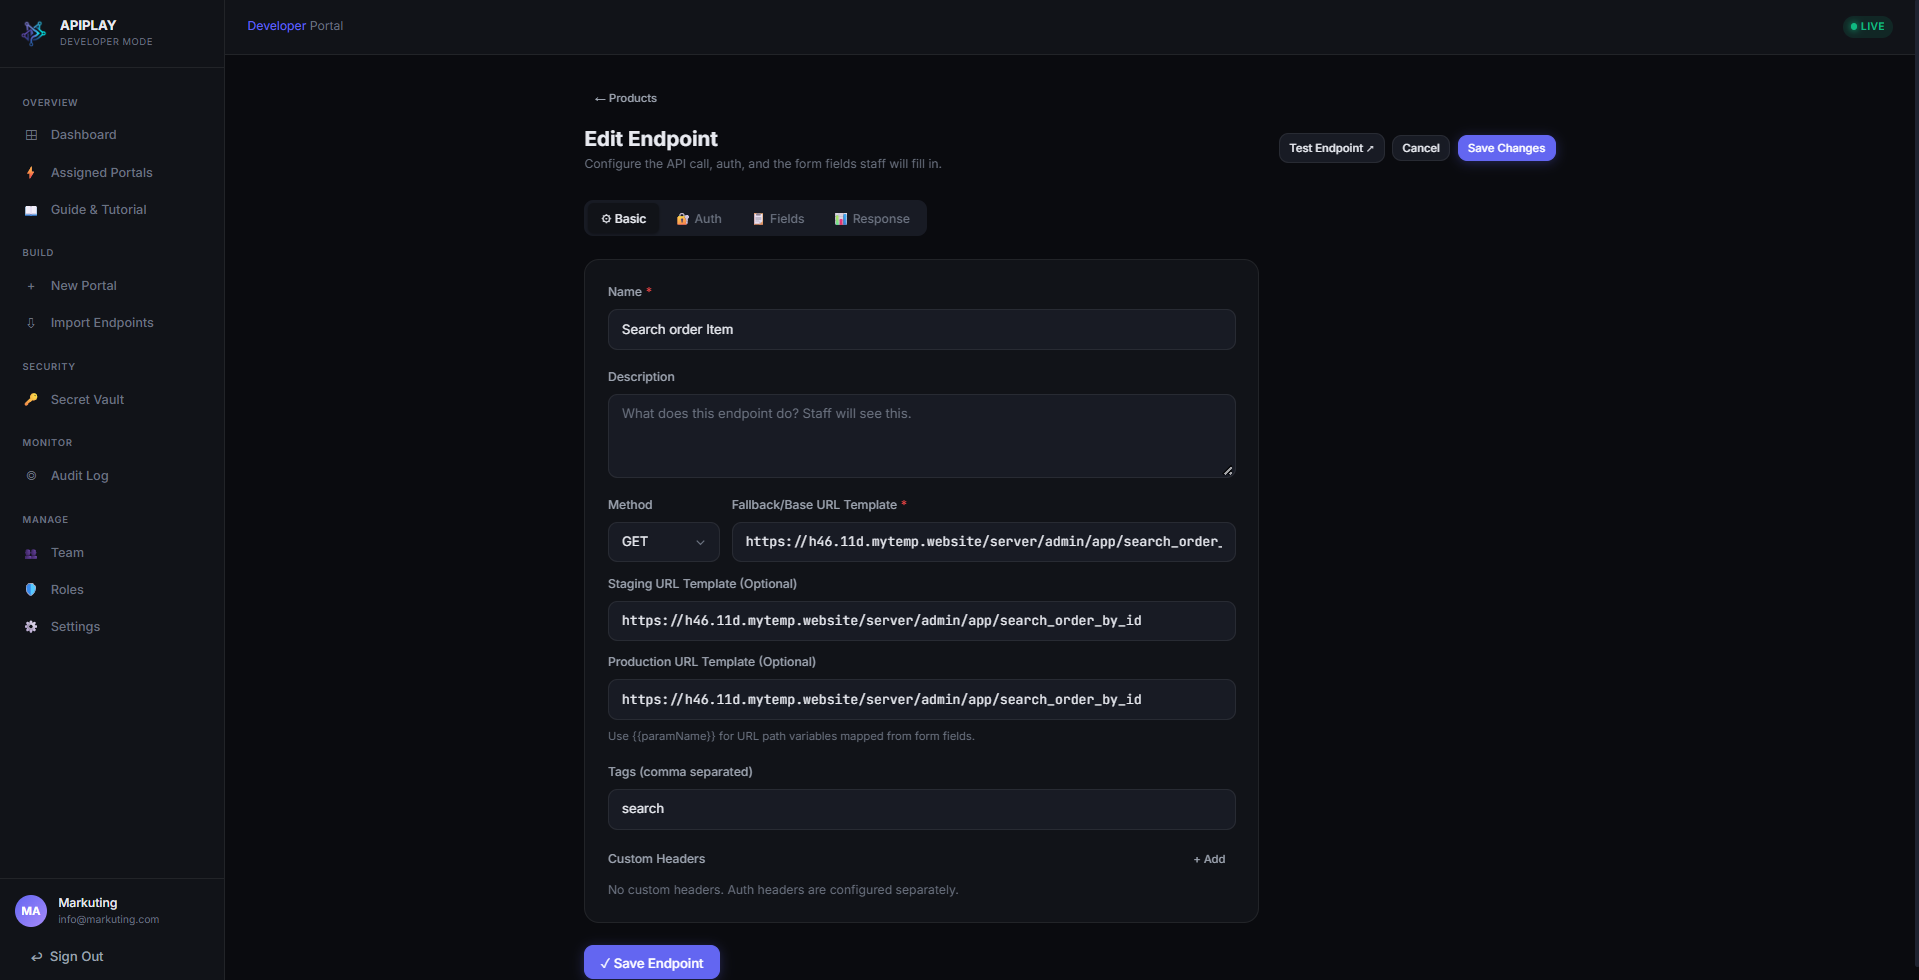
Authentication Types & Secret Vault
APIPLAY supports multiple secure authentication methods. Instead of hardcoding API keys where staff could see them, you use the Secret Vault and reference them using the {{SECRET:KEY_NAME}} syntax.
Example: Setting up Bearer Token Auth
- Create the Secret: Go to the Secret Vault and create a new secret named
MY_PAYMENT_KEYwith your real API token (e.g.,sk_live_12345...). This is instantly encrypted with AES-256. - Configure the Endpoint: Under the Auth tab for your endpoint, select Bearer Token.
- Fill the Value: In the token field, enter exactly:
{{SECRET:MY_PAYMENT_KEY}}. - How it works: When a staff member runs this endpoint, APIPLAY's backend securely decrypts the secret and injects
Authorization: Bearer sk_live_12345...into the outgoing request. The staff member never sees the actual token, preventing credential leaks.
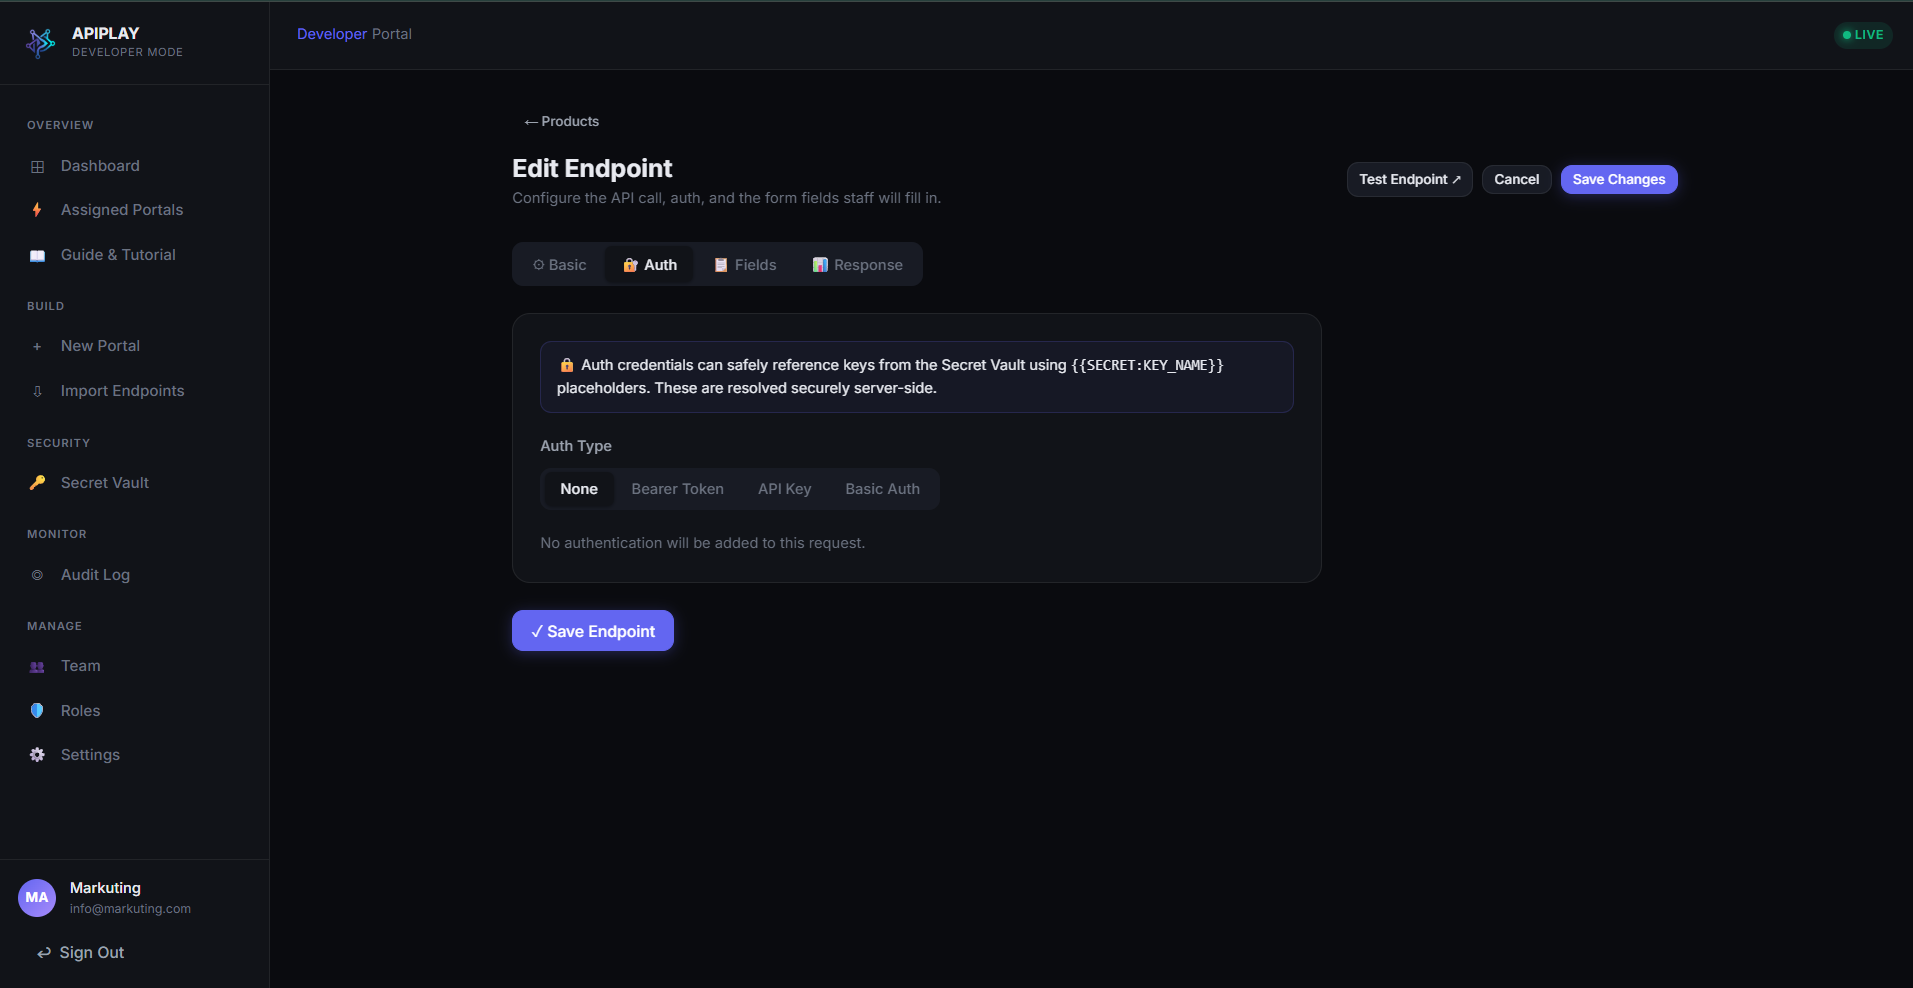
{{SECRET:MY_ACCESS_TOKEN}}).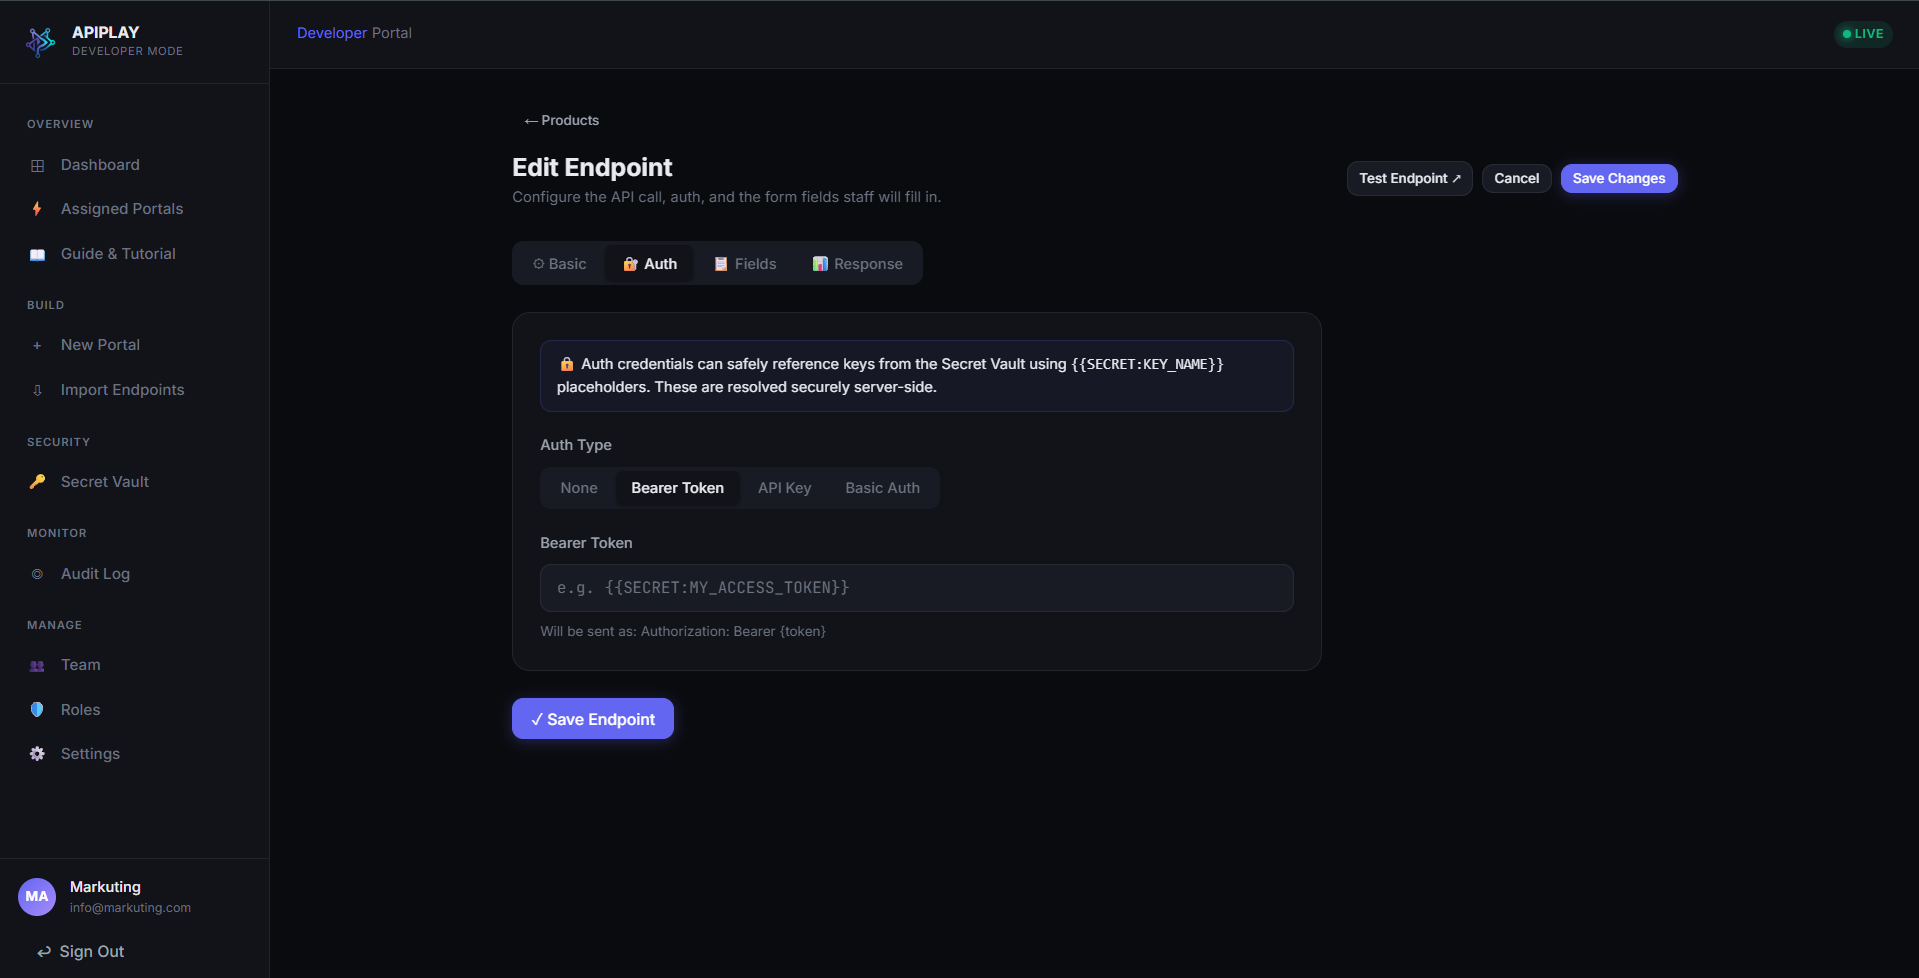
x-api-key, Value: {{SECRET:MY_API_KEY}}).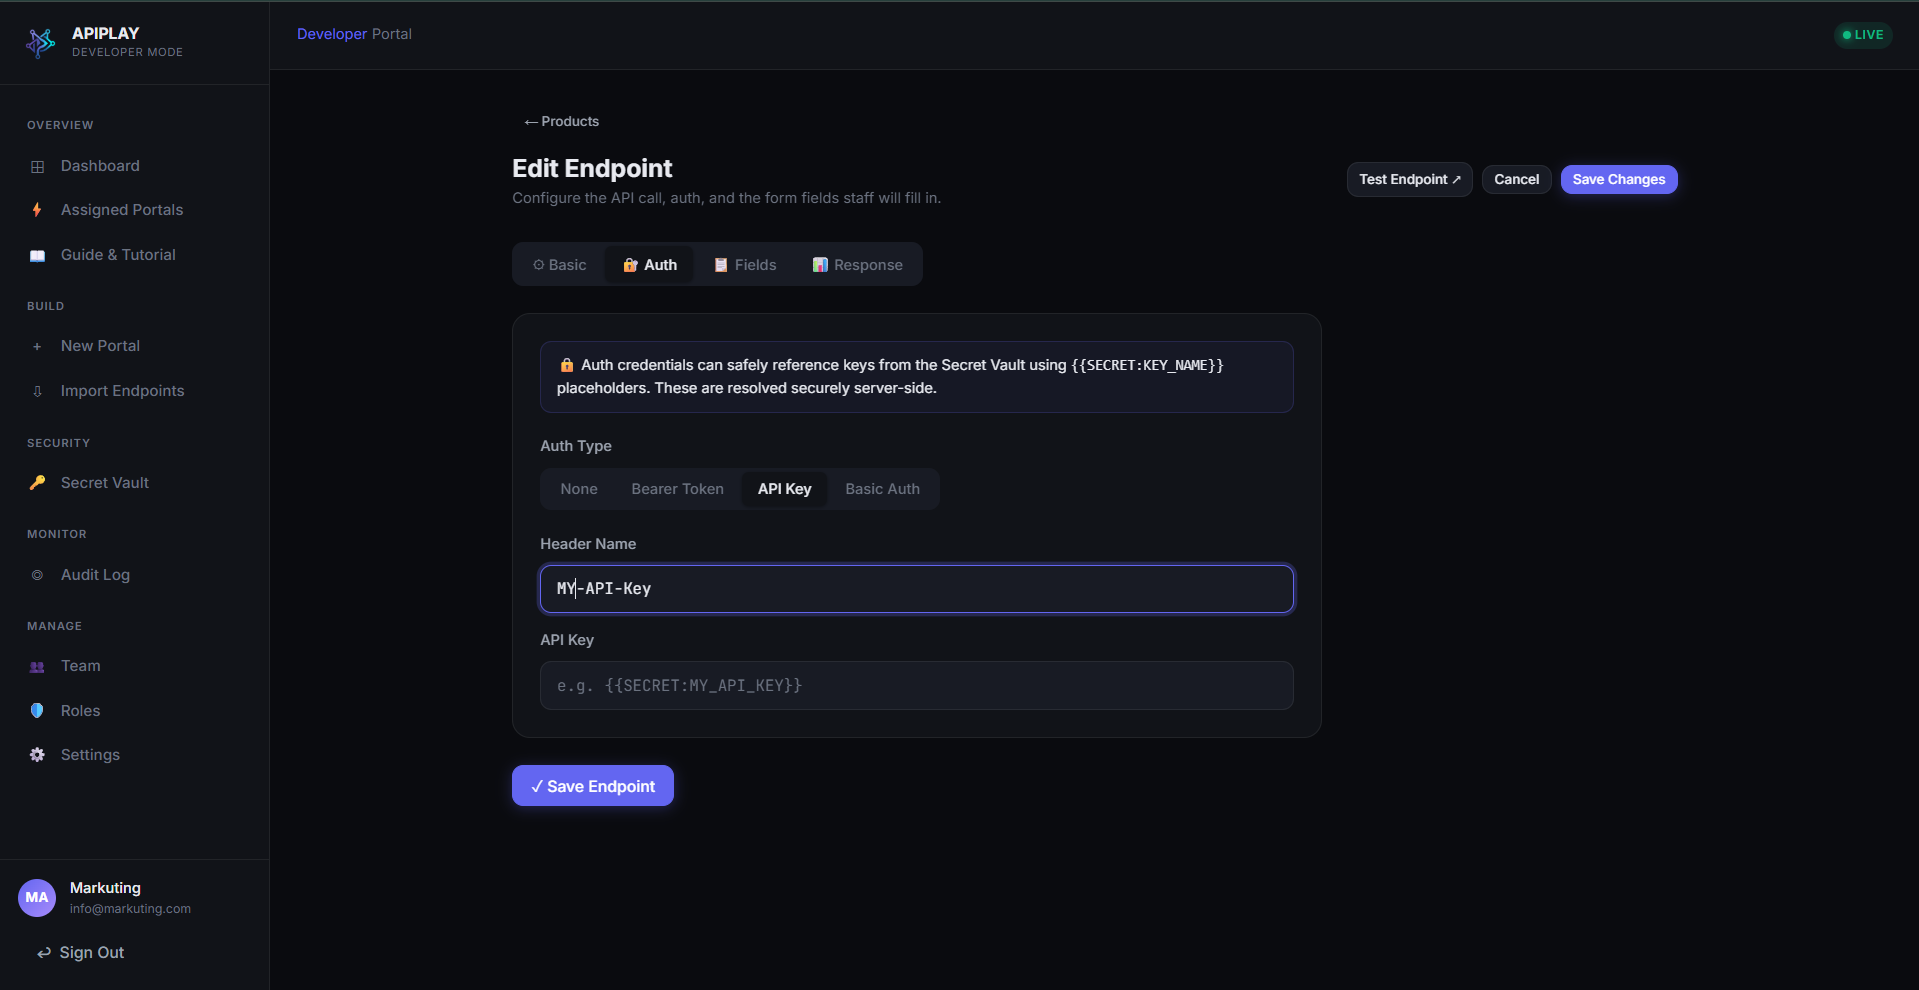
admin, Password: {{SECRET:MY_DB_PASS}}).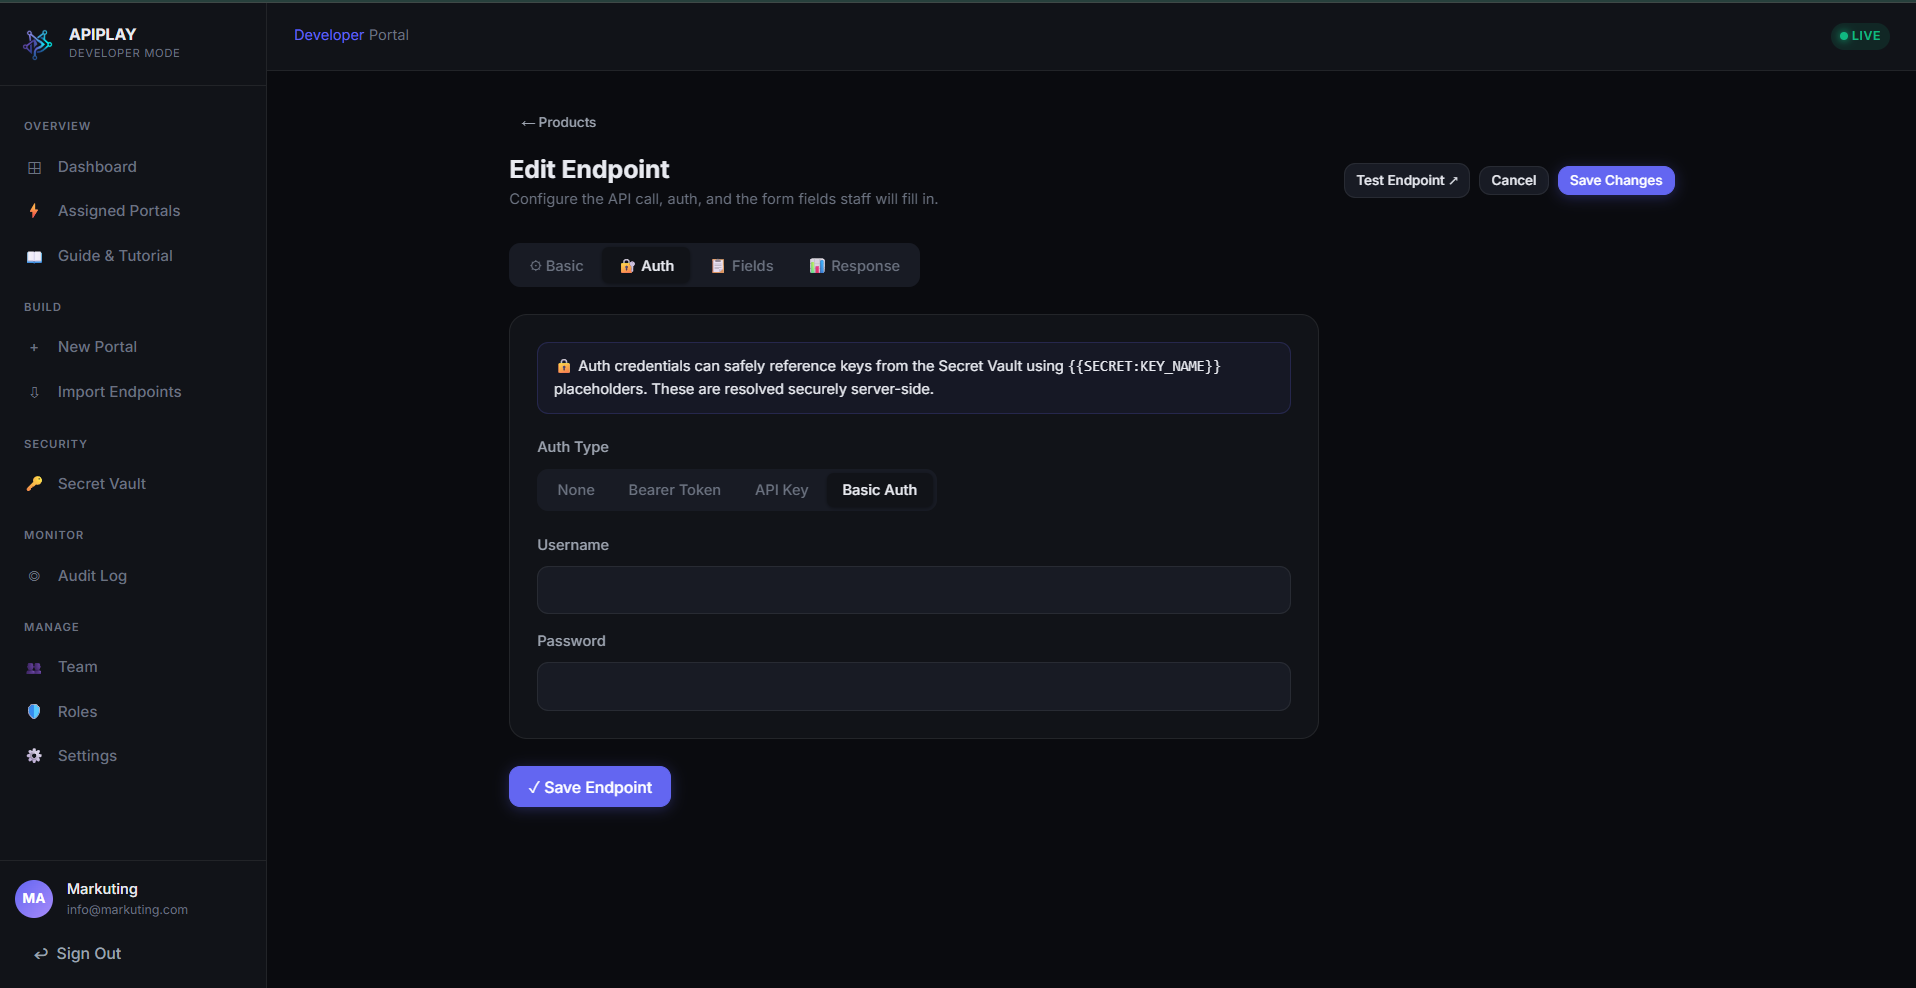
5. Form Fields Mapping
The Fields tab allows you to map dynamic form inputs directly to your API parameters (e.g., Query Params, JSON Body fields). This is exactly what the staff member will fill out.
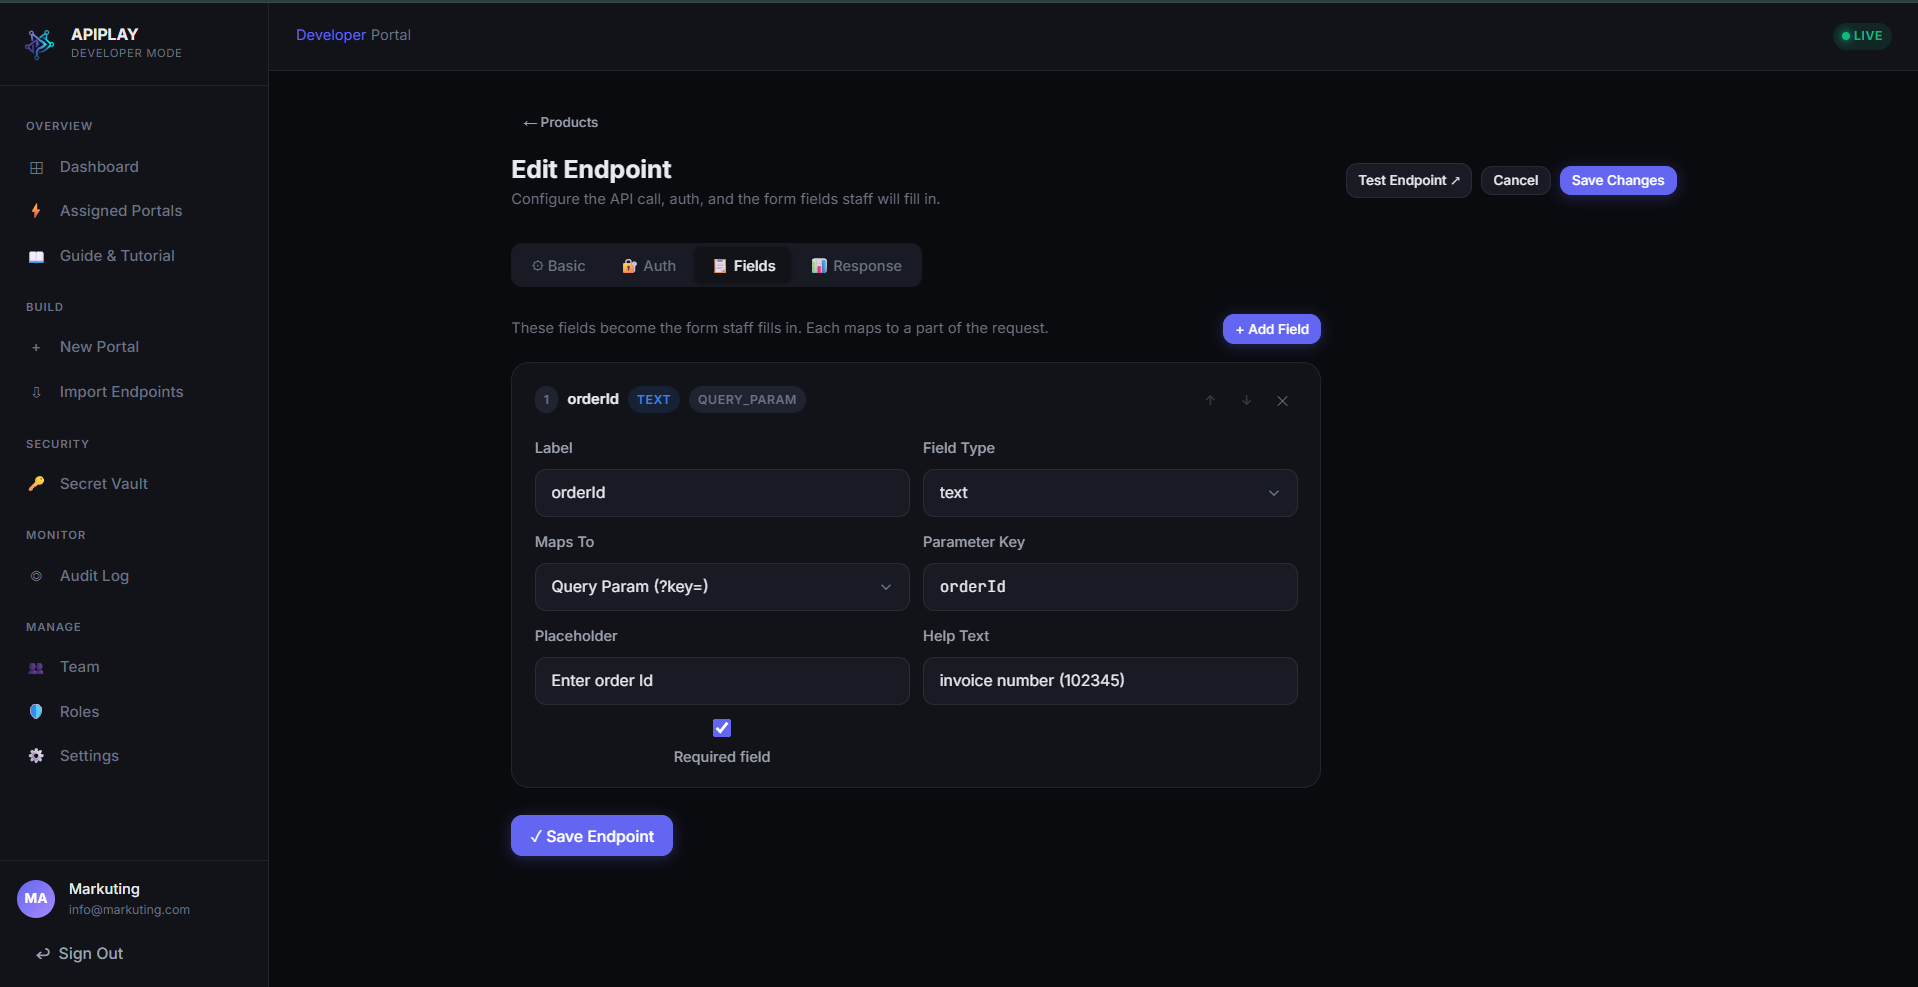
6. Response Configuration
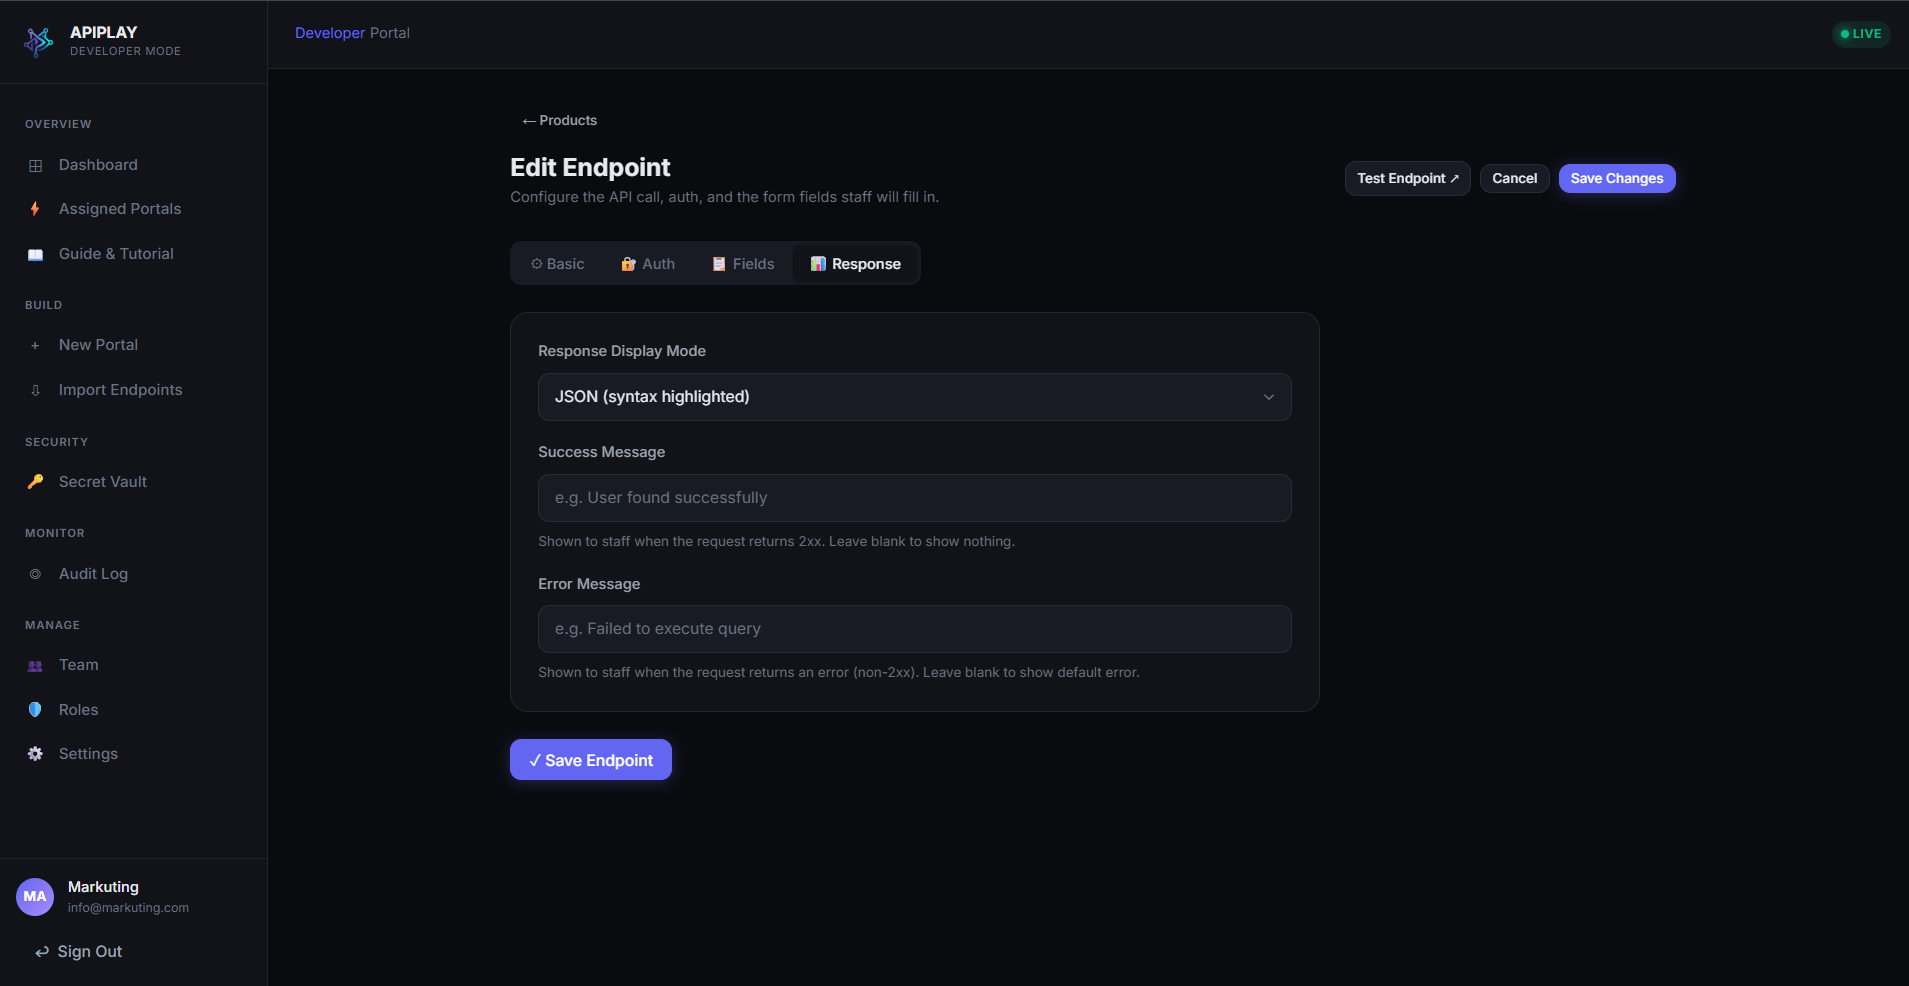
Decide how the API response should be presented to your staff. You can define success/error messages and choose display modes like syntax-highlighted JSON or data tables.
7. Roles & Permissions
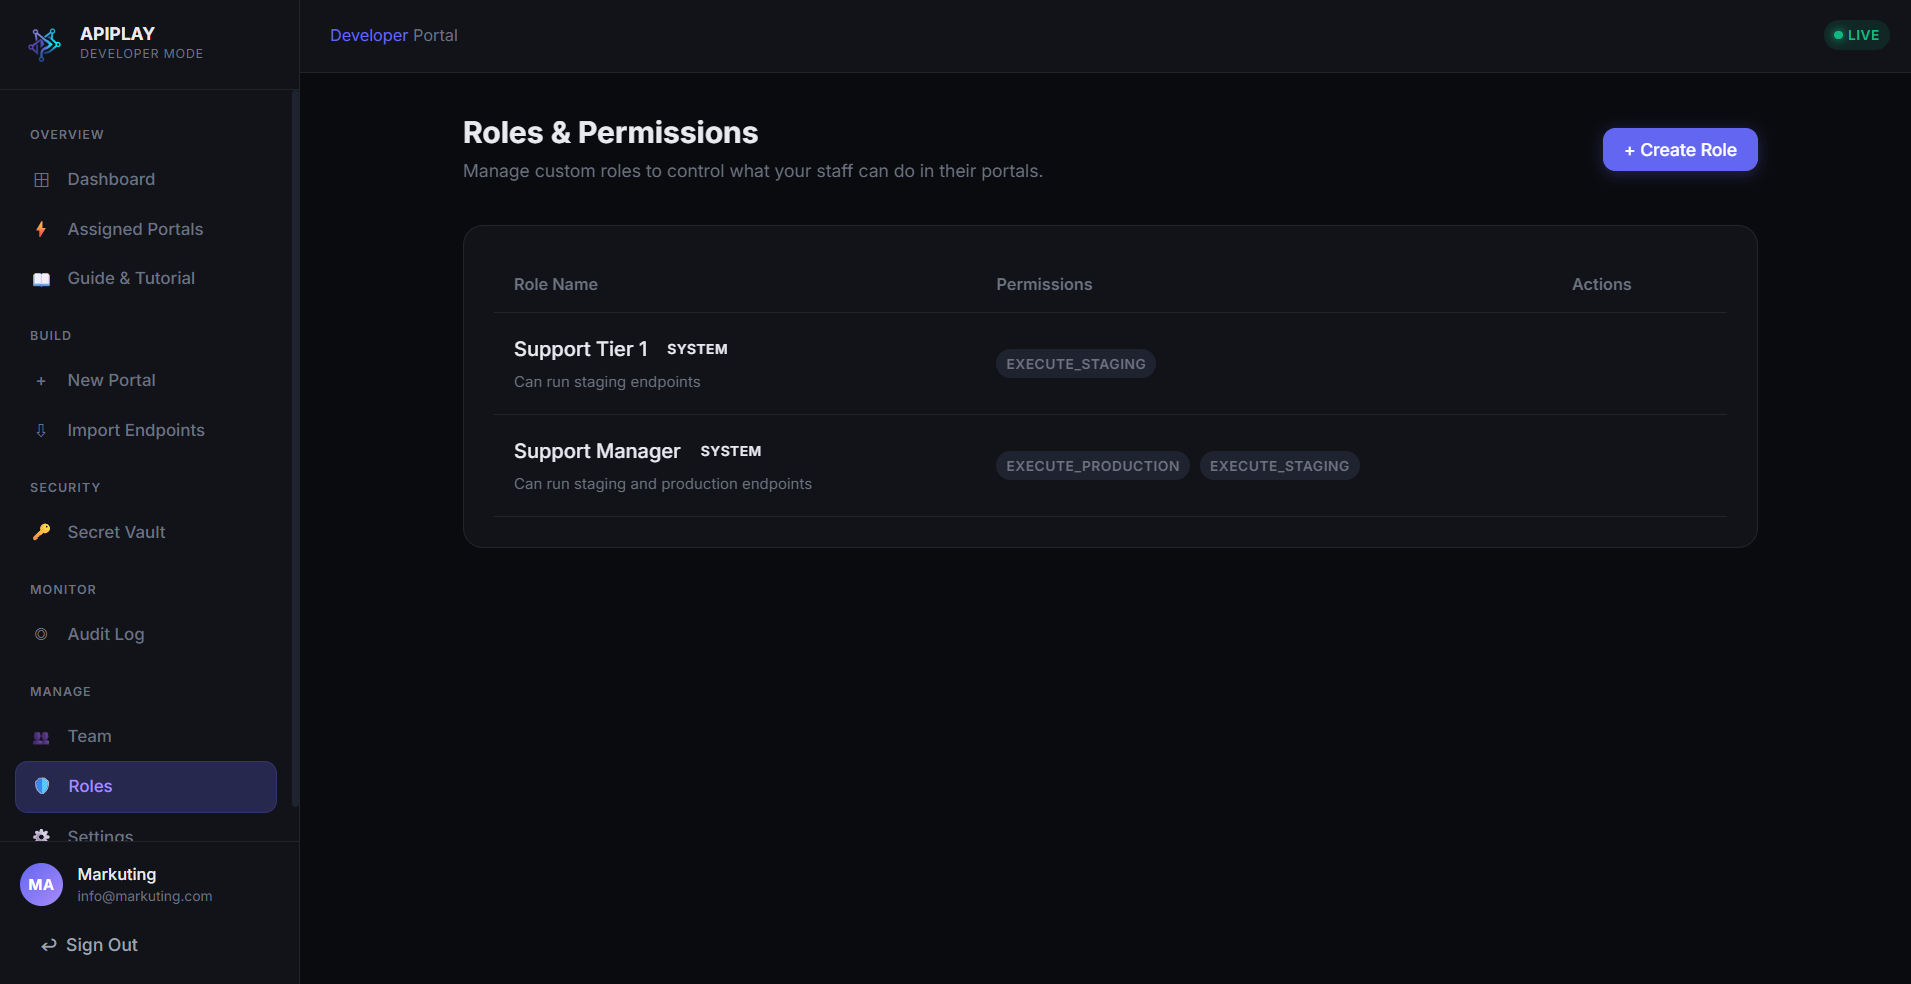
Before staff can run endpoints, they need to be assigned to a Role. Navigate to the Roles & Permissions section to view existing roles like Support Tier 1.
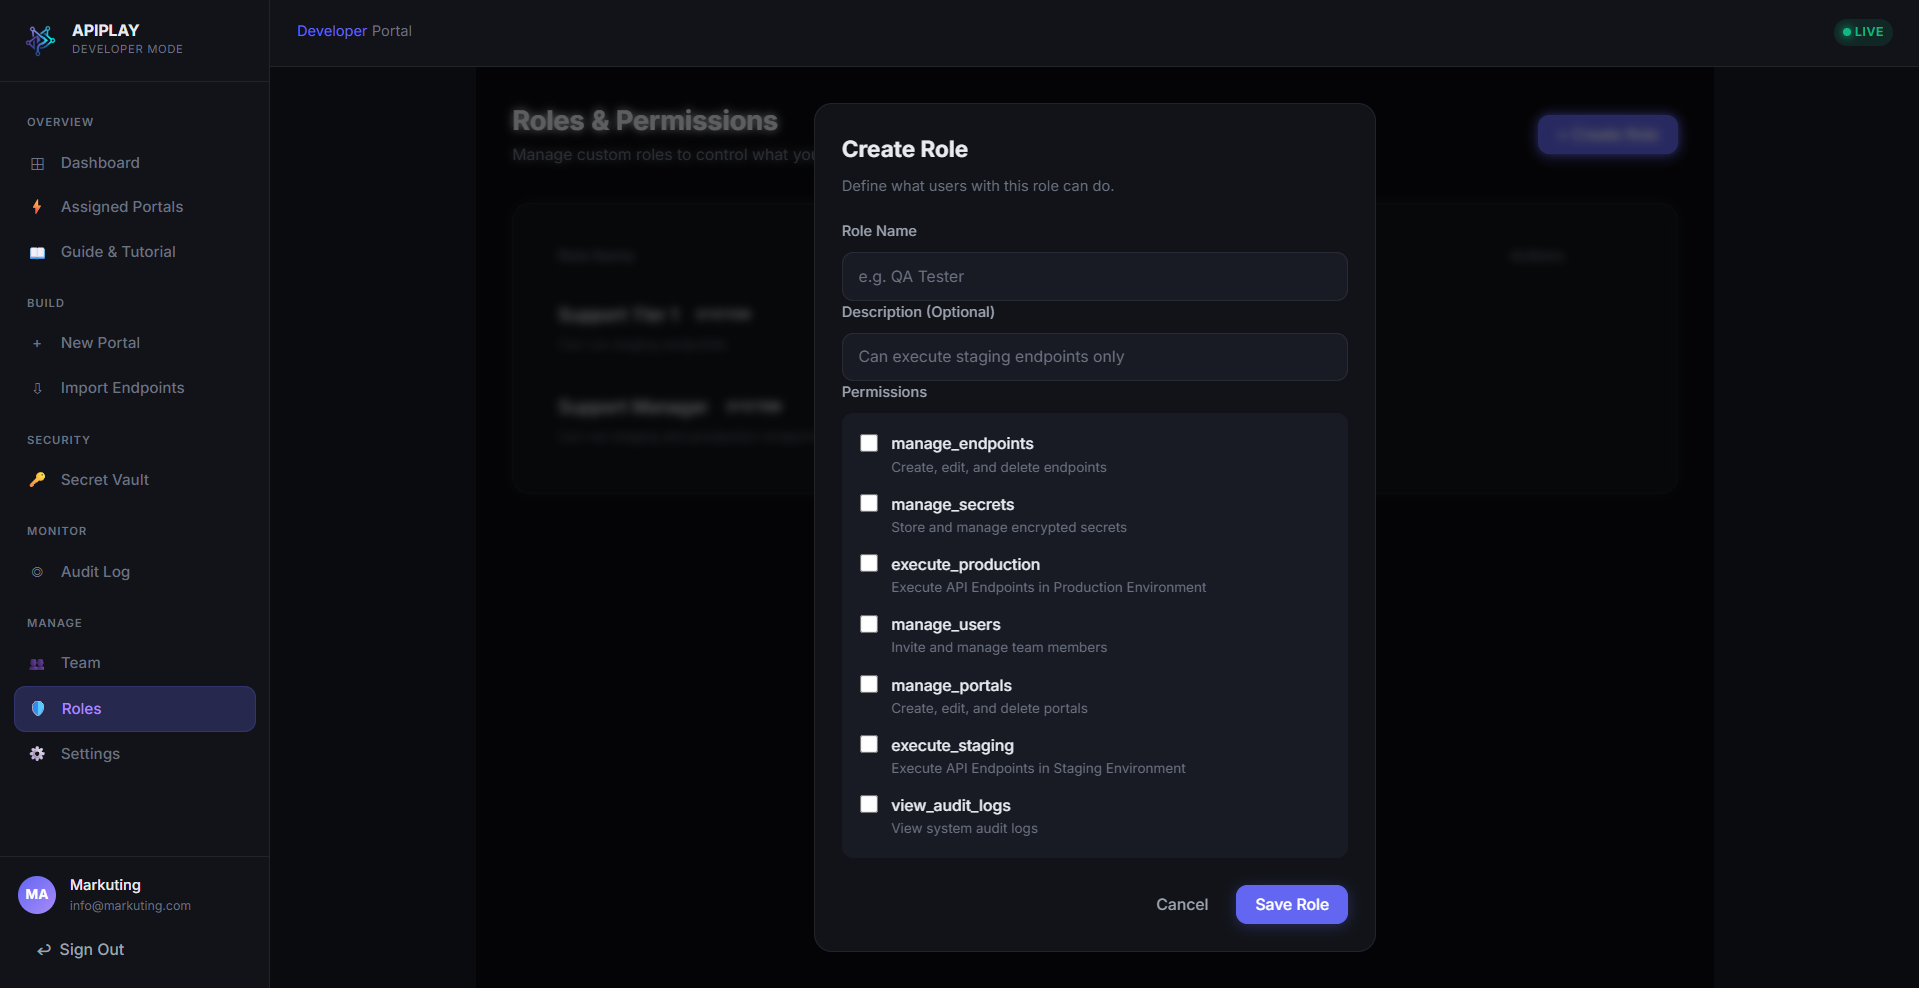
When creating a new role, you have granular control over permissions. For instance, you can allow a user to only execute staging endpoints but not production endpoints, or prevent them from accessing the Secret Vault.
8. Staff Execution Flow
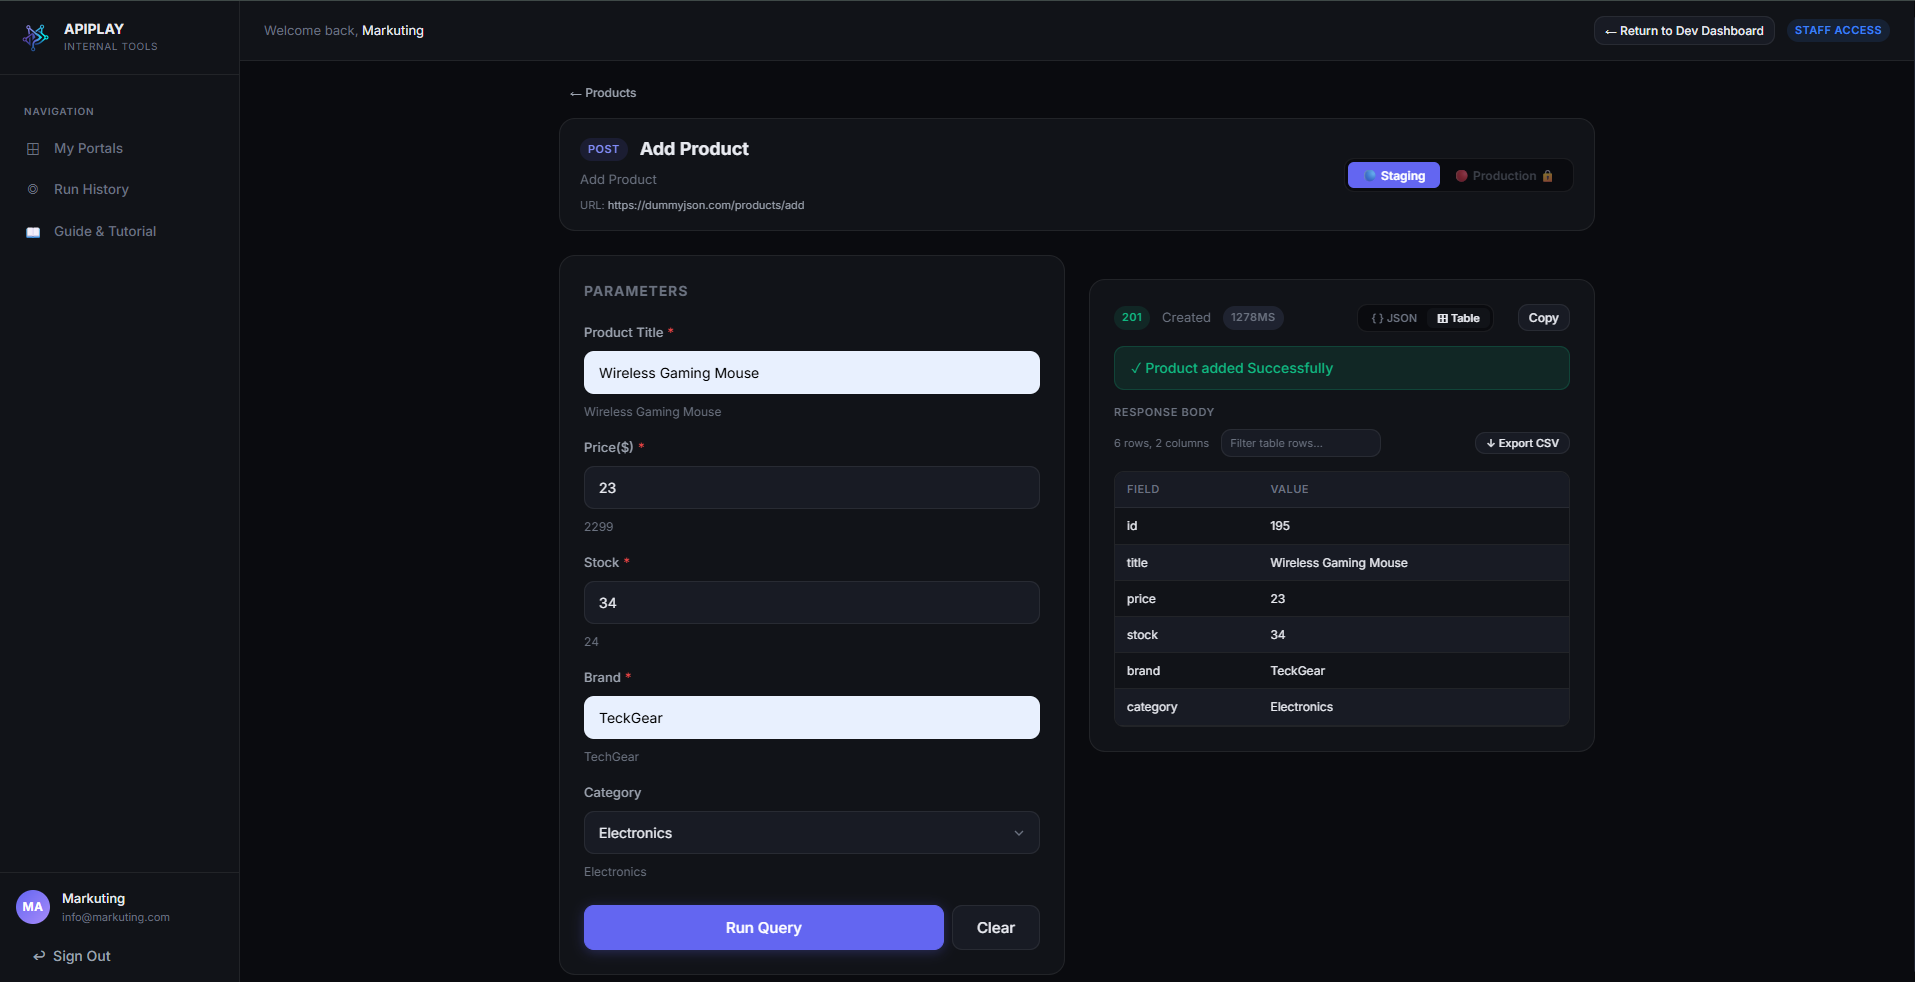
When an authorized staff member logs in, they access the portal and select the endpoint. They are presented with a clean, generated UI based on your field mappings.
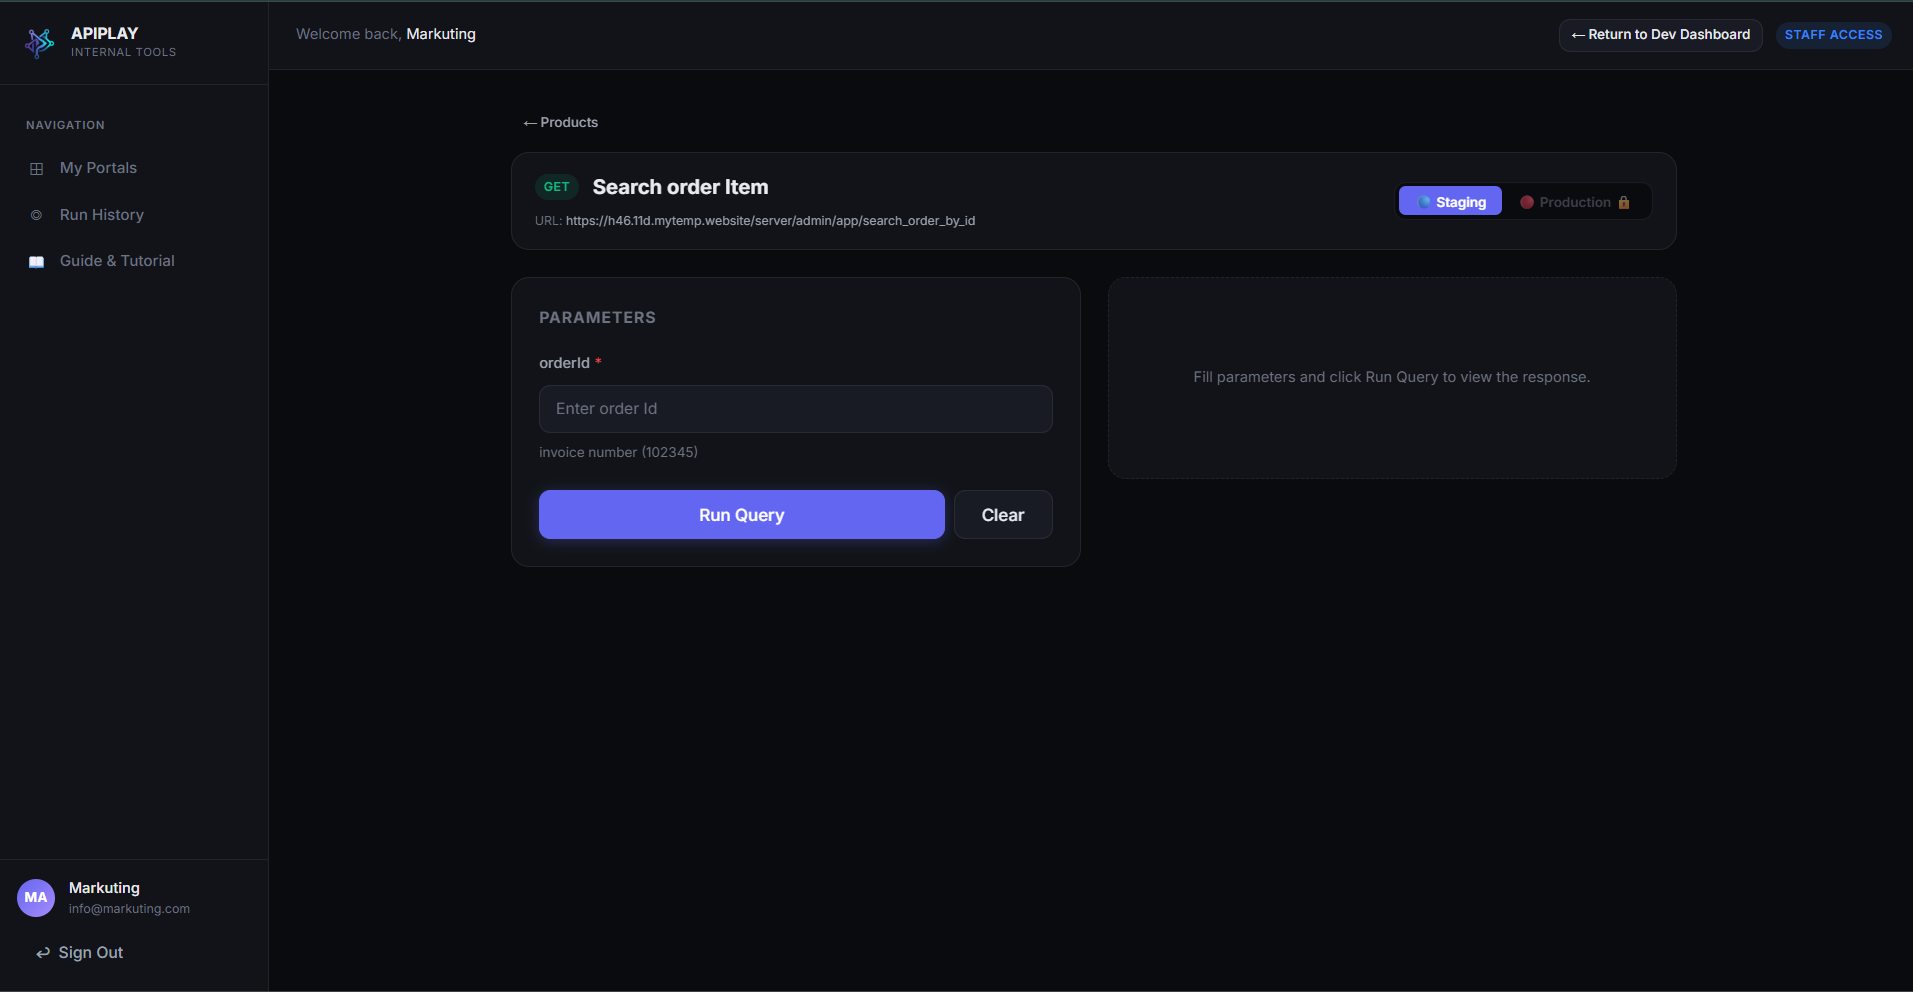
They fill out the required parameters, such as a Product Title, Price, Stock, etc.
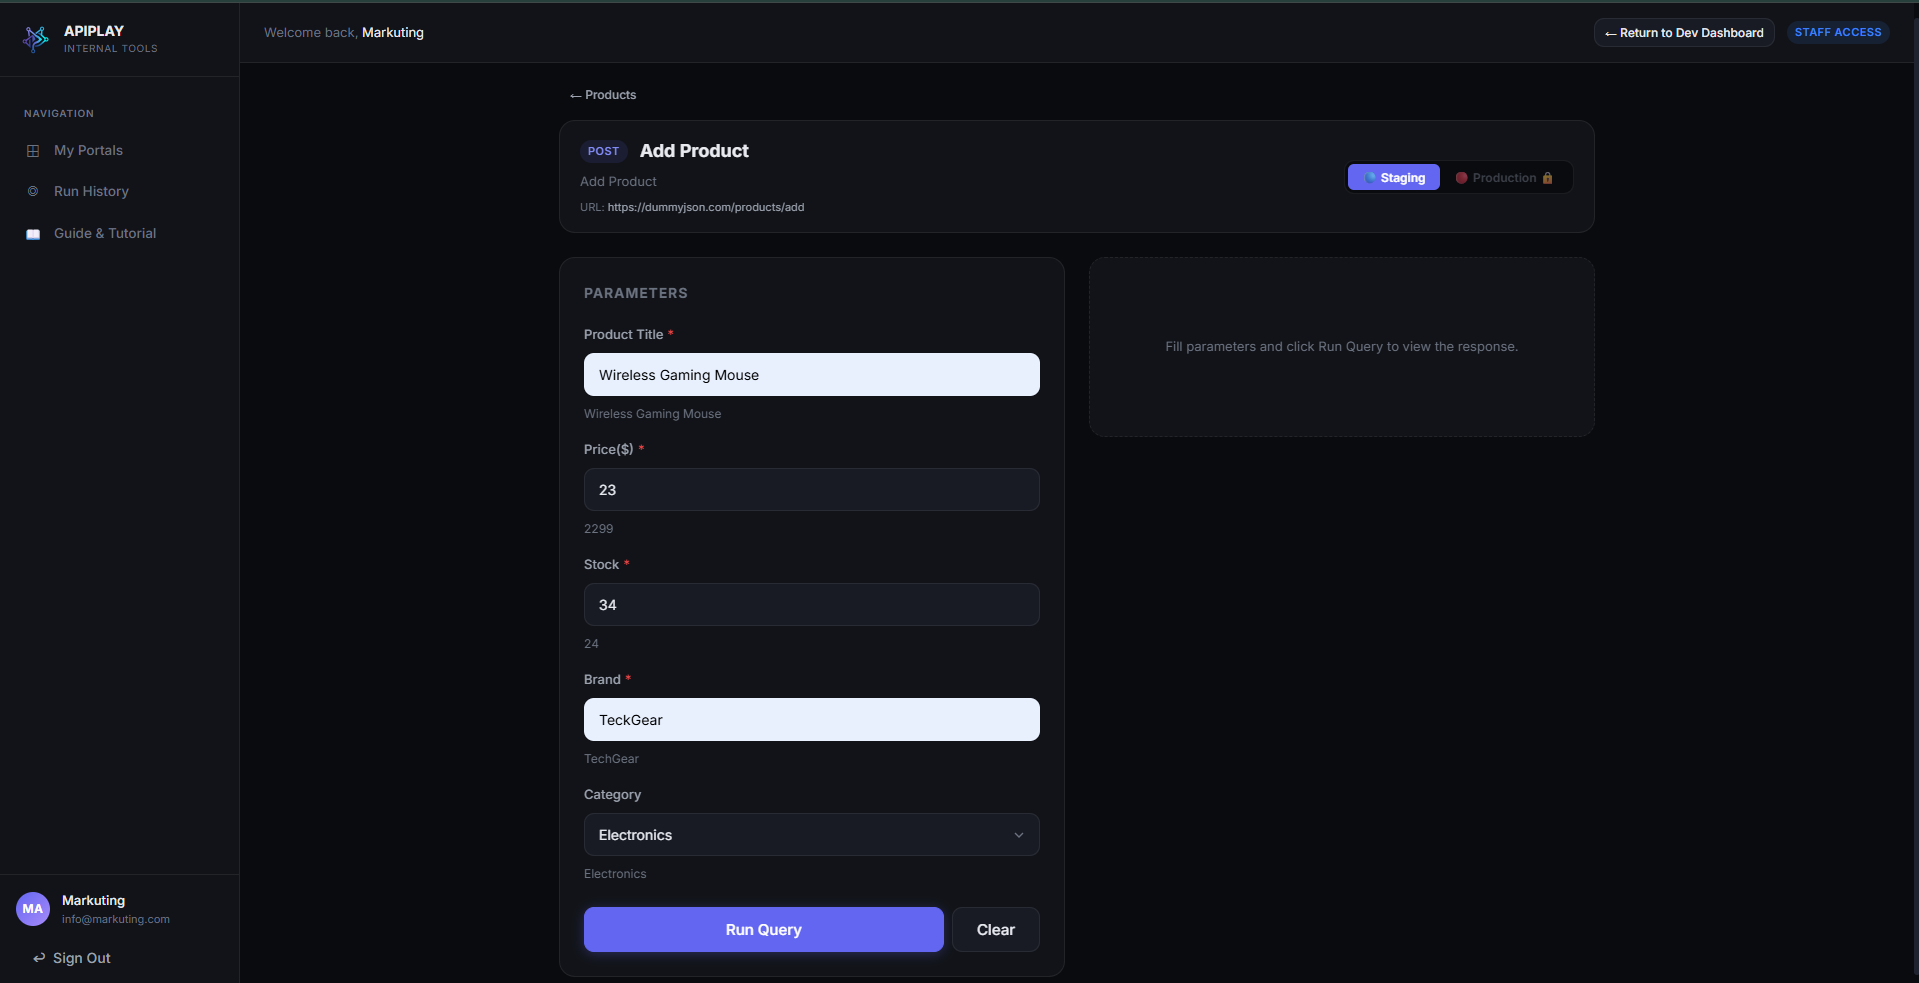
Upon execution, the secure API call is made from the backend. The staff member sees the response data rendered beautifully as a table (or JSON) and receives a success confirmation.